First make sure the version of your phone is x.80.x.x or later.
You can do it manually using the phone GUI (see below) or you can add to the PBX provisioning template so the parameters can be provisioned automatically from the server.
Here are the settings to use if provisioning the phone from the PBX or provisioning server:
account.1.vq_rtcpxr.collector_name = %%mac_address%%
account.1.vq_rtcpxr.collector_server_host = rtcpxr.cloud.iptechview.com
account.1.vq_rtcpxr.collector_server_port = 6550
phone_setting.vq_rtcpxr.session_report.enable = 1
voice.rtcp_xr.enable = 1
sip.third_part_request.use_outbound.enable = 0
In the text above your provisioning server or PBX needs to replace %%mac_address%% with phone's MAC. Check with your provisioning server to see what variable you can use. If you use an SBC as outbound proxy make sure to add the sip.third_part_request.use_outbound.enable = 0 setting.
Here is how you manually configure thru phone GUI
1. Under Settings - Voice Monitoring enable VQ RTCP-XR Session Report
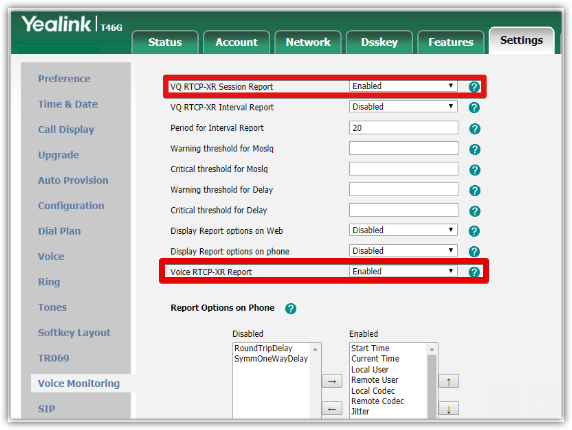
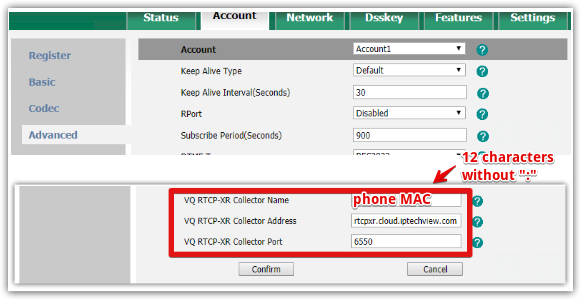
2. Under Account - Advanced configure the three VQ settings as shown below:
VQ RTCP-XR Collector Name = The phone MAC (12 characters with out ":". i.e. 001565BF1234)
VQ RTCP-XR Collector Address = rtcpxr.cloud.iptechview.com
VQ RTCP-XR Collector Port = 6550
Note:
If you use an SBC as outbound proxy make sure to add the sip.third_part_request.use_outbound.enable = 0 setting using the import CFG configuration option under Settings.
3. Save and reboot the phone
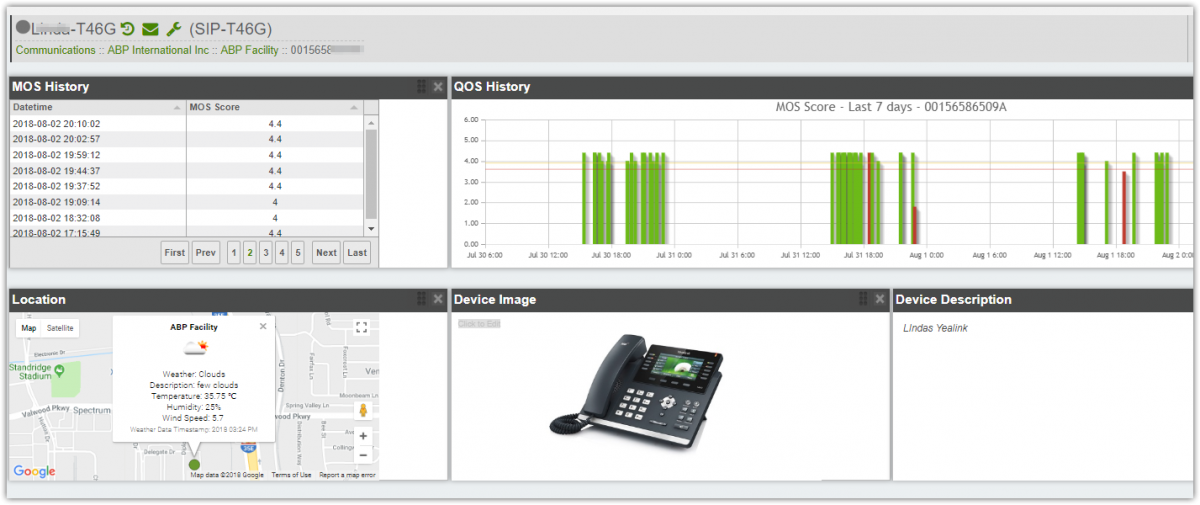
Once this is configured place a call and your phone should report the Voice Call Quality value to our servers.
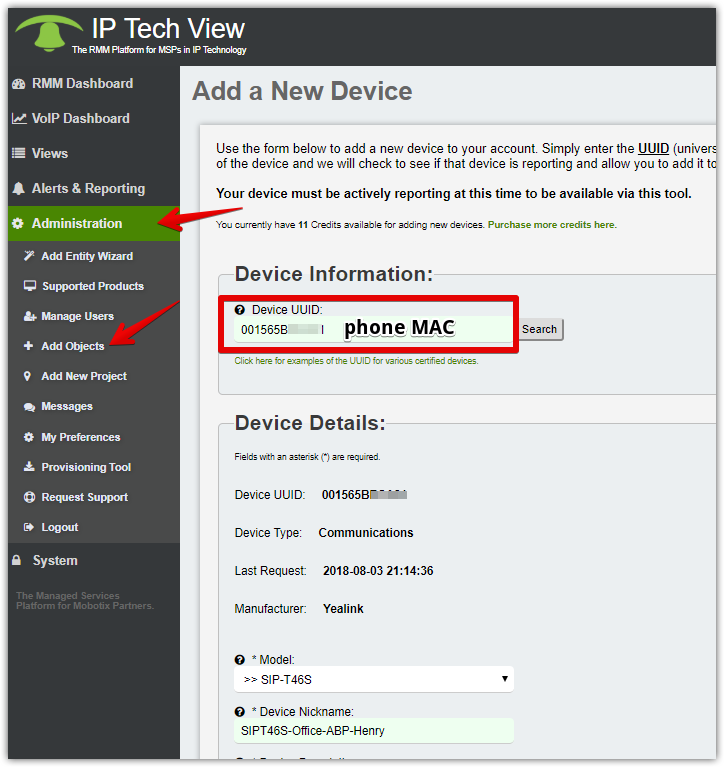
Soon after that you add the phone MAC Address to IPtechview
The phone now can be found in the VoIP Dashboard where you can see all the VoIP QoS MOS score for each new call.